The spirit of the holidays begins in the kitchen. Cheese biscuits, gingerbread and garnet-hued poached pears are three simple yet festive ways to celebrate
By Jane Lear
“The harried modern person looks to the winter holidays like someone slumped across a railroad track contemplating an oncoming train,” mused food writer Laurie Colwin more than 25 years ago. Her words resonate today amid the ever-increasing hype, and I, for one, refuse to get caught up in the fray. When it comes to feeding people, for instance, I tend to rely on a small repertoire of things I can pull together without too much fuss and which will make folks feel cherished.
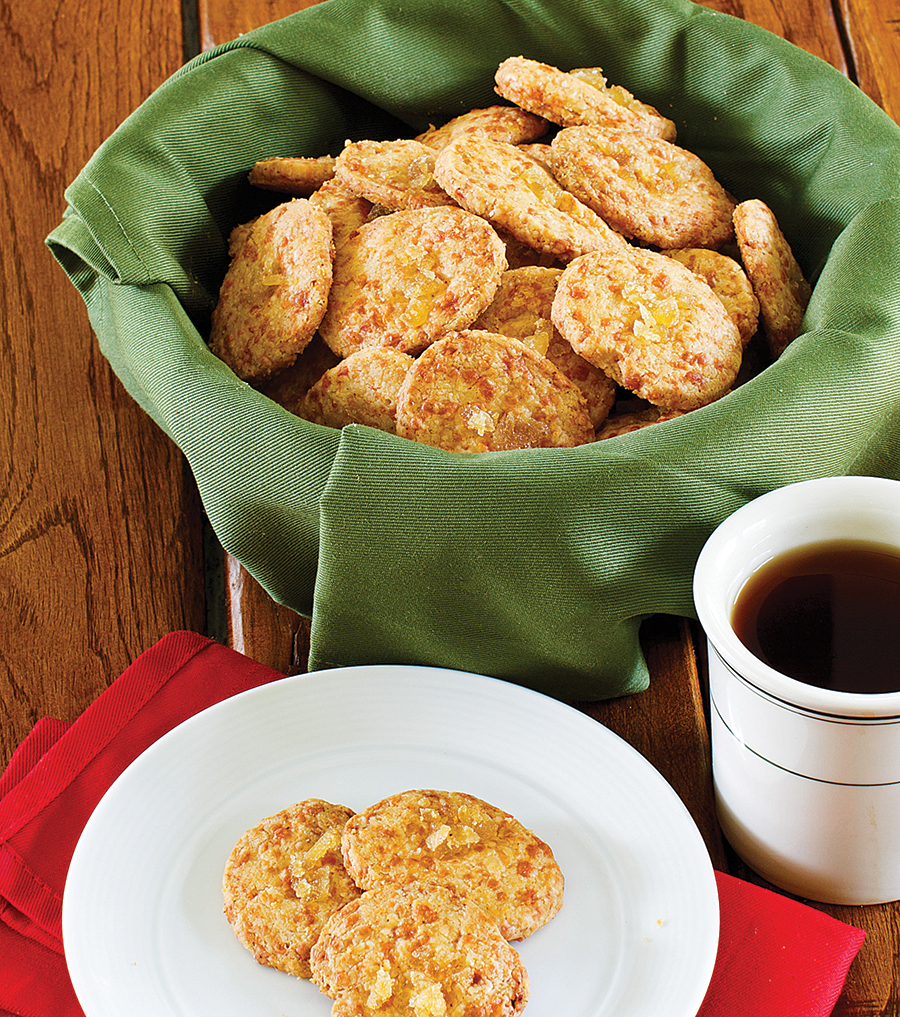
Cheese biscuits are at the top of my list. I’m using the word biscuits here in the British sense to mean crisp wafers, and it’s still fairly common parlance in Colonial cities such as Wilmington. In fact, you’ll see a recipe for these cayenne-spiced nibblies (often in the form of cheese straws) in every community and Junior League cookbook published south of the Mason-Dixon Line. They’re standard fare at drinks parties, wedding receptions, and almost every other social occasion you can think of.
I’m very fond of how my mother served them, with soups and stews. Perhaps this was because the store-bought bread available at the time wasn’t particularly flavorful (a basic baguette or sourdough loaf was unattainable), or perhaps she wanted a change from baking powder biscuits or cornbread; I don’t know. But cheese biscuits are a great way to add a little savory richness, some finesse, to an everyday meal. One — just one, mind you — is also a civilized way to end an evening, along with a nightcap, or what some of us call a baby-doll.
And cheese biscuits make a fabulous present. Even though it’s possible to buy every imaginable delicacy online these days, I think people are especially thrilled to open a gift that is homemade and almost profound in its plainness. And that is not something sweet.
Southerners appreciate cheese biscuits because they know one can never have too big a stash. For expat Northerners, there is an element of surprise, and, once tasted, delight. “Where have these been all my life?” the recipients exclaim, reaching into the tin for another. And cheese biscuits have legs — that is, real staying power. Not only are they good keepers, but you don’t get sick to death of looking at them, the way you do Christmas cookies. Face it: By early January, those cookies are so last year.
Cheese biscuits are so simple to make that anyone, even a person who suffers from an extreme case of F.O.F. (Fear of Flour), can throw them together without thinking about it. The secret is to buy the sharpest cheddar you can find, and add a little Parmigiano, “for sass,” as the cookbook author Damon Lee Fowler likes to say.
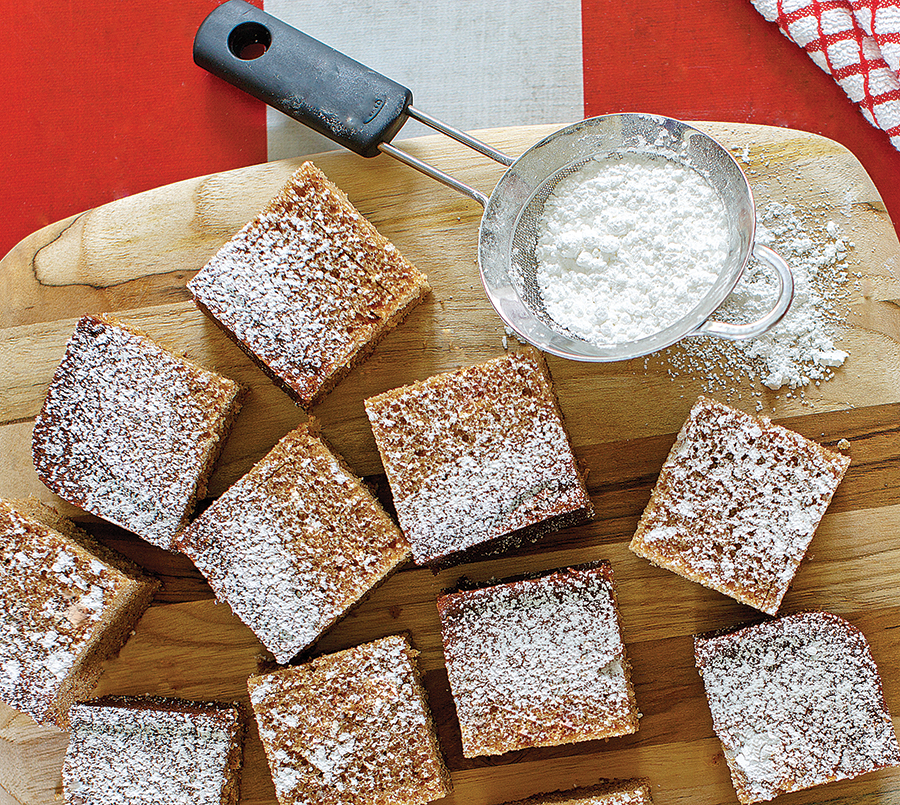
Gingerbread is another standby in my holiday kitchen because it is easy to make and a hit with young and old alike. It can be enjoyed absolutely plain or dressed up with a glaze made from lemon juice and confectioners sugar, or with billows of whipped cream flavored with a little bourbon. It’s the sort of thing you can serve guests at a fancy dinner party, and they will immediately feel like they’re part of the family.
Whenever I make gingerbread, I am reminded of my Aunt Eloise — actually, a longtime friend of my mother’s — who often visited us during the holidays. She would arrive in an immaculately maintained Buick and insist on carrying her own suitcase into our hall, setting it down with a little sigh. (“Always travel light, dear,” she counseled, years before I ever went anywhere. “You may have to move fast.”)
My brother and I couldn’t wait to present ourselves before Aunt Eloise because we knew exactly what would happen. She would shake her head in amazement at how much we had grown, and hug us thoroughly before rummaging through a capacious handbag for two chocolate bars, wrapped in thin gold foil and glossy paper.
We had to open them very carefully, because Aunt Eloise wanted the foil back. Like my parents, she had grown up during the Great Depression, and never wasted a thing. She would smooth the sheets and tuck them away with a smile.
The days before Christmas were filled with tree-cutting and decoration, setting up the crèche, which had an expanded cast (my father trolled thrift shops and pawn shops looking, in particular, for the Baby Jesus — he couldn’t bear the thought of one being adrift), and frantic gift wrapping.
And then, of course, there was the gingerbread. Dark, moist, and spicy, it was Aunt E.’s specialty. One year, she turned to face my brother and me in the kitchen. “I have always made gingerbread for you,” she said, removing her apron and hitching it up, neat and workmanlike, around me. “Now, it’s your turn.” She switched on the oven and then got comfortable at the kitchen table. Mom made cups of tea for them both and buttered the pan.
My brother stirred the flour, baking soda and spices together. I plugged in the Sunbeam and managed to cream the butter and dark brown sugar, then beat in the eggs and cane syrup — preferred by all in our house to molasses. I stopped, startled, when the mixture looked curdled, but Aunt Eloise peered into the bowl and said, “Oh, it’s fine! Just keep going and see what happens.”
After beating in the flour mixture and a little hot water, everything miraculously came together. After my mother helped me pour the batter into the pan, she put it into the hot oven.
By the time the dishes were done, so was the gingerbread. Aunt Eloise patted several pockets — she had a magician’s knack for misdirection — before unerringly settling on the right one, then fished out an envelope full of small gold stars, cut out of foil. They smelled very faintly of chocolate as we pressed them into the warm cake.
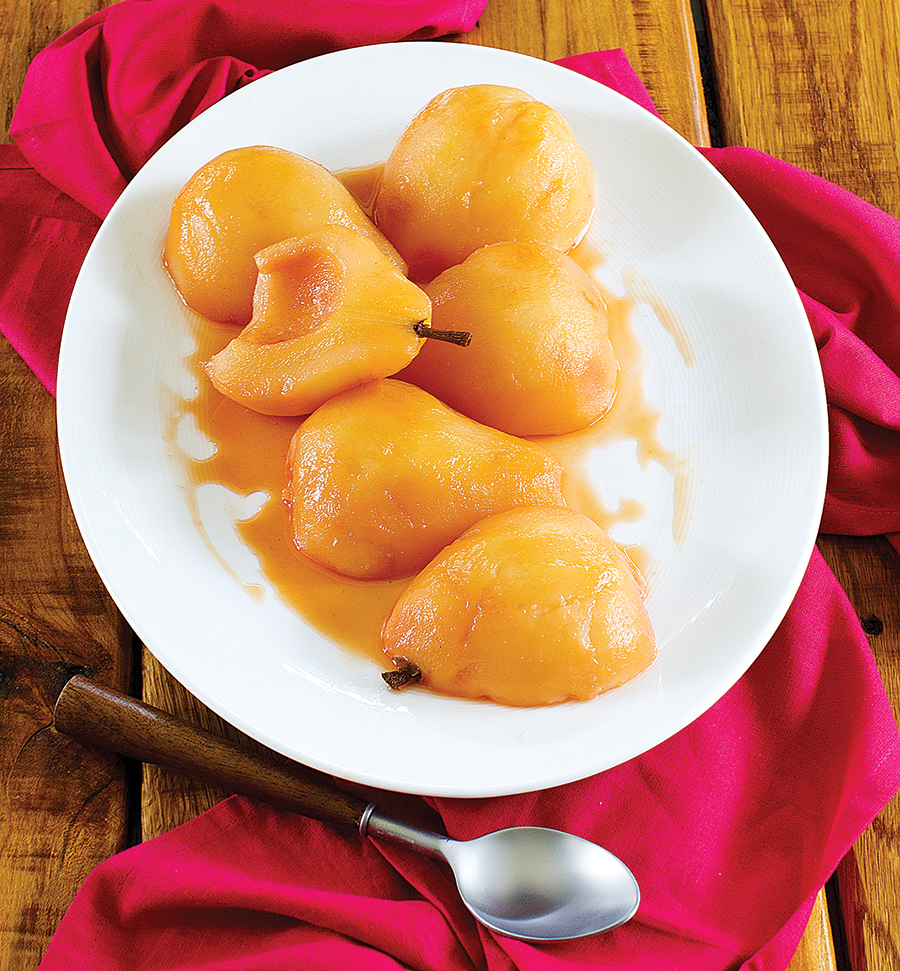
Now, when it comes to holiday food that is both easy and spectacular, things get a bit trickier. It pays to keep a file of these recipes, and if they happen to be gluten and/or dairy free, or not terribly bad for you, then so much the better. My go-to favorite is a recipe for scarlet poached pears developed by my former Gourmet colleague Paul Grimes, a brilliant food stylist with a painter’s eye.
Because poached pears rarely look as good as they taste, Paul took a cue from a dessert at Le Chateaubriand, in Paris, which uses a beet to intensify the pears’ hue. If you or yours don’t happen to like beets, no worries: You can’t taste the beet in the least, and the fresher and juicier it is, the deeper in color the fruit will become.
Beets have long been used as a dye for textiles and food, by the way. Before the advent of artificial colorants, they put the “red” in red velvet cake, for instance, and they turn Easter eggs a delicate mauve. The vegetable’s saturated color, like that of bougainvillea, amaranth and the flowers of some cacti, comes from pigments called betalains (from Beta vulgaris, the Latin name of the common beet).
Poaching is among the gentlest of cooking techniques. Although it isn’t complicated, you do want to be mindful of the heat. You don’t want the liquid to vigorously boil — otherwise, whatever it is you’re cooking will either break apart or toughen. A lower flame allows you greater control and precision. The end result — whether you are poaching chicken, say, or eggs or fruit — should possess the quality of moelleux (mwall-YEW) — a soft, velvety mouthfeel that is completely, captivatingly French.
If you are at all resistant to the idea of poached pears, you’ve likely been traumatized by one that threatened to skid across the table when pierced with a fork. This usually happens during a first date or dinner with the boss. But understanding moelleux — the pears should be so tender they practically melt in your mouth — is a gamechanger. The key to success is very basic: You must cook the pears until they are done. Since the pears may be of slightly different sizes or at different stages of ripeness, be sure to test them all. When you insert a small skewer or paring knife, it should glide in but the flesh should still feel solid, not mushy.
Cheese biscuits, gingerbread and gorgeous poached pears have become three of my favorite traditions of the season, and here’s hoping they find a place at your table as well. Happy holidays!

Gingerbread
I don’t have Aunt Eloise’s recipe, but this is a close approximation. It’s based on the Tropical Gingerbread (minus the canned coconut) in Charleston Receipts — a standard reference for both Aunt E. and my mother — and the Old-Fashioned Gingerbread in the big yellow Gourmet Cookbook. When it comes to the cane syrup, you should know that this syrup made from ribbon cane is lighter and sweeter than molasses. Not only is it a versatile baking ingredient, it makes the ultimate condiment for pancakes, waffles, and hot biscuits. Cane syrup is available at supermarkets in the South; one of my favorite mail-order brands is Steen’s (steenssyrup.com), from Louisiana.
1 stick unsalted butter, room temperature, plus extra to butter pan
2 cups all-purpose flour
1 teaspoon baking soda
1 1/2 teaspoons ground ginger
1 teaspoon ground cinnamon
1/4 teaspoon ground allspice or cloves
1/2 teaspoon salt
3/4 cup firmly packed dark brown sugar
2 large eggs
1/2 cup pure ribbon cane syrup
2/3 cup hot water
1. Preheat the oven to 350° and butter an 8- or 9-inch square baking pan. In one bowl stir together the flour, baking soda, spices and salt. In another bowl with an electric mixer beat together the butter and brown sugar at medium-high speed until nice and fluffy.
2. Beat in the eggs, one at a time, then beat in the cane syrup. At this point, the batter might look curdled, but, as Aunt Eloise would tell you, don’t worry about it. Reduce the mixer speed to low and beat in the flour mixture, then the hot water. Continue to beat until the batter is smooth, a minute or so.
3. Pour the batter into the pan and bake in the middle of the oven until a wooden skewer inserted in the center of the gingerbread comes out perfectly clean, around 35 to 40 minutes. Put the pan on a wire rack to cool for a bit, then serve warm. The gingerbread is also a great keeper: the flavor deepens after a day or so, and if tightly wrapped, the cake stays moist.

Scarlet Poached Pears à la Gourmet
Serves 6
If your pears are very small or ripe (instead of firm-ripe), then set the kitchen timer for 20 minutes, say, instead of the 35 to 40 minutes specified below. And if the pears are indeed done more quickly, then transfer them to a bowl to cool, remove the bay leaf and cinnamon, and continue to simmer the poaching liquid until thickened and syrupy.
About the poaching wine: Orange Muscat is not the easiest dessert wine to find, but don’t fret. Another muscat won’t have the same alluring orange-apricot aroma, but it will still be delicious. Serve these beauties with a fork, for stabilizing the pear, and a dessert spoon, for scooping flesh and juice.
2 cups Orange Muscat such as Quady Winery’s Essensia
(from a 750-ml bottle)
1 medium red beet (1/4 pound), peeled and sliced
1 tablespoon sugar
2 teaspoons fresh lemon juice
1 cinnamon stick (about 2 inches in length)
1 bay leaf
3 small firm-ripe pears (about 1 pound total), such as Forelle or Bosc, peeled, halved lengthwise, and cored
1. Bring wine, beet, sugar, lemon juice, cinnamon stick, and bay leaf to a boil in a 1 1/2 – to 2-quart saucepan, stirring until sugar is dissolved.
2. Add pears and cover with a round of parchment paper to help them cook and color evenly. (So that they stay covered with liquid, place a small saucer on top of the parchment as they cook.) Reduce the heat and simmer, turning occasionally, until pears are tender and liquid is syrupy, 35 to 40 minutes. Transfer pears to a bowl. Discard cinnamon stick and bay leaf and pour syrup over pears. Cool completely in syrup, about 30 minutes. Poached pears can be made 1 day ahead and chilled in the syrup; the color will deepen the longer they stay in the syrup.

Cheese Biscuits
1 1/2 cups all-purpose flour
1 teaspoon coarse salt
A generous pinch cayenne
1 stick unsalted butter, cut into pieces and softened to room temperature
6 ounces extra-sharp orange cheddar plus 2 ounces Parmigiano-Reggiano, coarsely grated (about 2 cups total) and at room temperature
Finely chopped crystallized ginger, for garnish
1. Whisk together the flour, salt and cayenne in a bowl until combined well. In another bowl, with a stand mixer, beat together butter and cheese until smooth. Beat dry ingredients into cheese mixture until smooth. The dough should be very malleable, like Play-Doh.
2. Roll the dough into a couple of logs for slicing. Wrap in waxed paper and chill until firm but not hard, about 30 minutes. (Dough keeps in the refrigerator 1 week. You can also freeze it, wrapped well; let it thaw at room temperature until pliable enough to work with.)
3. Preheat oven to 350 degrees and cut each log into 1/8-inch rounds, giving the log a quarter turn after each slice so it stays round. Put a dab of the crystallized ginger on top of each biscuit, pressing gently so it adheres.
4. You can either bake the biscuits, one baking sheet at a time, in the middle of the oven, or set the racks in the upper and lower thirds, and switch the baking sheets halfway through. Depending on the size and thickness of your biscuits, they’ll take anywhere from 16 to 18 minutes to bake. They are done when the bottoms are golden but the tops and sides are still pale. Let cool on a wire rack. Biscuits will stay fresh in an airtight tin for days and even improve in flavor.
Jane Lear, formerly of Gourmet magazine and Martha Stewart Living, is the editor of Feed Me, a quarterly magazine for Long Island food lovers.


